Shopify smart collections: conditions, examples and bulk setup
How Shopify smart collections work: creating one, the conditions you can use, five every store needs, why wrong products show, and creating many at once.
October 10, 2026 · 7 min read
A smart collection (Shopify calls them smart in the admin; the API calls them automated) fills itself: instead of picking products one by one, you write conditions such as "product tag is equal to wool" and every matching product joins, including products you add next month. Set up well, smart collections mean you almost never touch a collection again. Set up badly, they quietly show the wrong products. This guide covers both.
How to create a smart collection
- Go to Products → Collections → Create collection.
- Enter a title and description (the description shows on the collection page and helps it rank).
- Under Collection type, choose Smart.
- Choose whether products must match all conditions or any condition.
- Add conditions: a field, a test and a value, for example Product tag · is equal to · wool.
- Fill in the SEO title and description under Search engine listing, set the sales channels, and save.
Decide the type before saving: a collection's type can't be switched between smart and manual afterwards. You'd have to create a new collection and redirect the old URL.
The conditions you can use
Smart collection conditions can test a product's:
- Title, type, vendor and tag;
- price and compare-at price (handy for a "Sale" collection: compare-at price is greater than 0);
- weight, inventory stock and variant title;
- product category from Shopify's standard taxonomy;
- and metafields that have a definition with the smart collection option turned on.
Text fields offer tests such as is equal to, is not equal to, starts with, ends with, contains and does not contain; numbers offer greater than and less than. Tags are stricter: a tag condition matches the exact tag.
Five smart collections most stores should have
- Sale: compare-at price is greater than 0. Products join and leave as you start and end sales.
- New arrivals: tag is equal to
new, then remove the tag after a few weeks (or sort a catch-all collection by newest). - Brand pages: vendor is equal to Acme, one collection per brand.
- Brand × category: vendor is equal to Acme and product type is equal to Boots. These long-tail pages often rank for "acme boots" searches.
- Under $25 / gifts: price is less than 25, all conditions, plus a tag to keep out things that aren't giftable.
Why a smart collection shows the wrong products
- "Any condition" instead of "all conditions". With any, a product only has to match one rule, so collections balloon.
- Inconsistent tags.
wool,Wool(trailing space) andwool-blendare different tags to a rule. Clean them first (see bulk editing tags). - Contains matches too much. "Title contains cap" also matches "capsule" and "cape".
- Variant rules. Price, weight and inventory rules match if any variant matches, so one cheap variant puts the whole product in an "under $25" collection.
- Draft or unpublished products match the rule but don't show on the storefront, so the count in the admin looks higher than the page.
Creating many smart collections at once
The admin creates one collection at a time, and Shopify has no CSV import for collections (the product CSV can set tags, vendor and type, which rules can match, but it can't create the collections). If you need 40 brand pages or a brand-by-category grid, the native choices are clicking through the form 40 times or writing code against the Admin API.
Shelfport: Collection Import adds the missing spreadsheet. Each smart collection is a row with its title, handle, match setting (all or any) and one rule per row written in plain words, such as vendor equals Acme or price less_than 25, plus SEO title, description, image and sort order. The workflow:
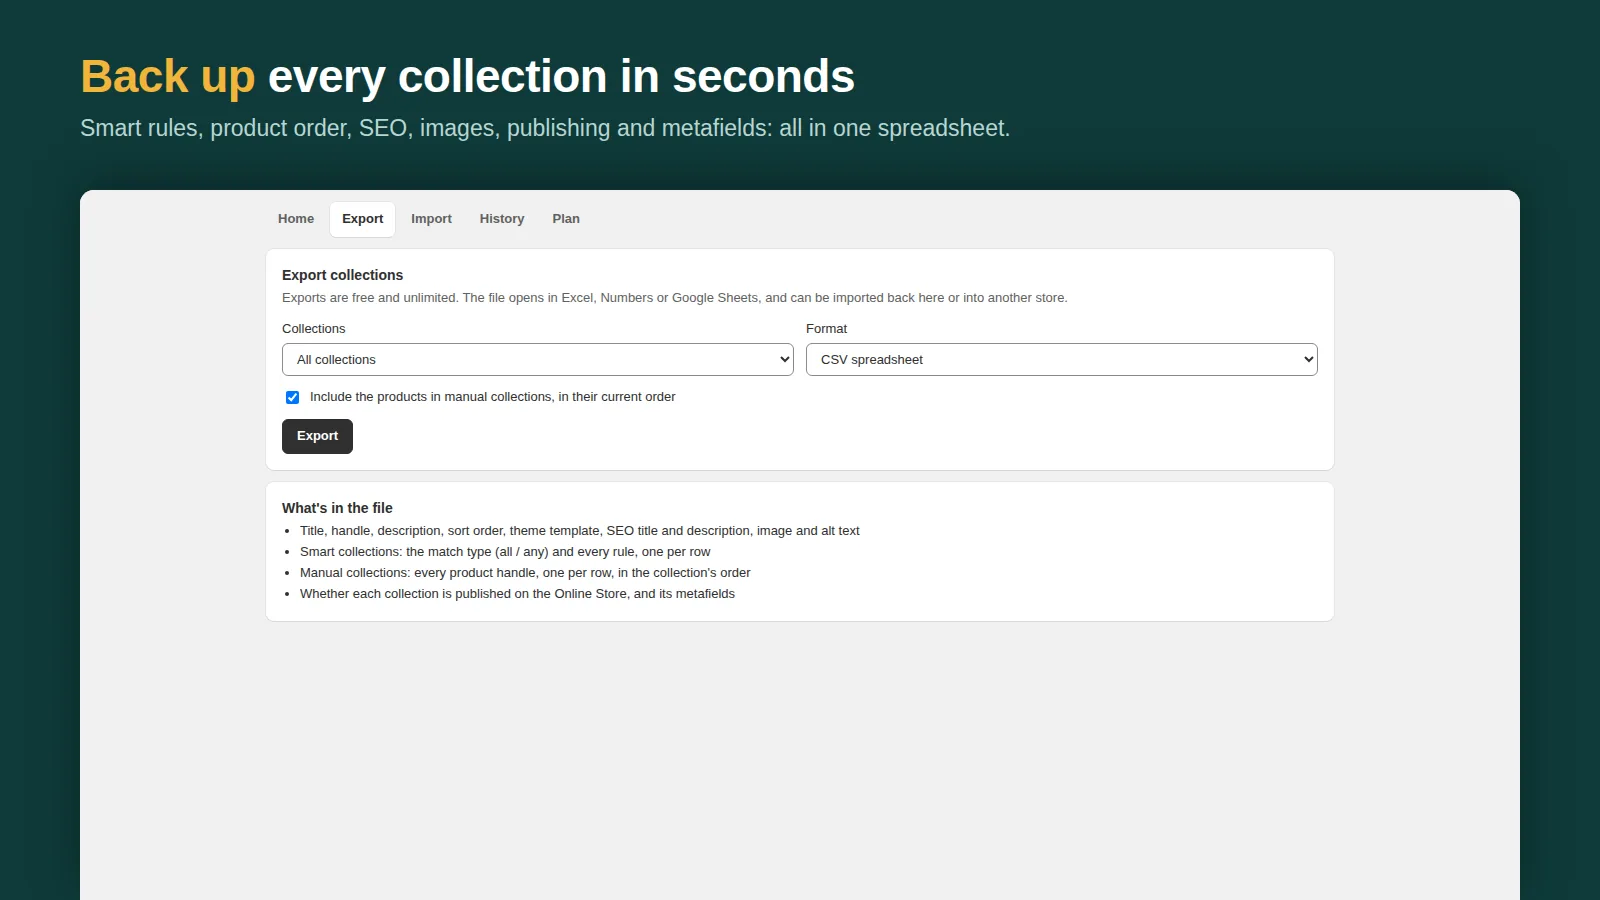
- Export your current collections (or start from the template) as an Excel or CSV file.
- Add a row per new collection and its rules. Copy and paste is the whole trick for a brand × category grid.
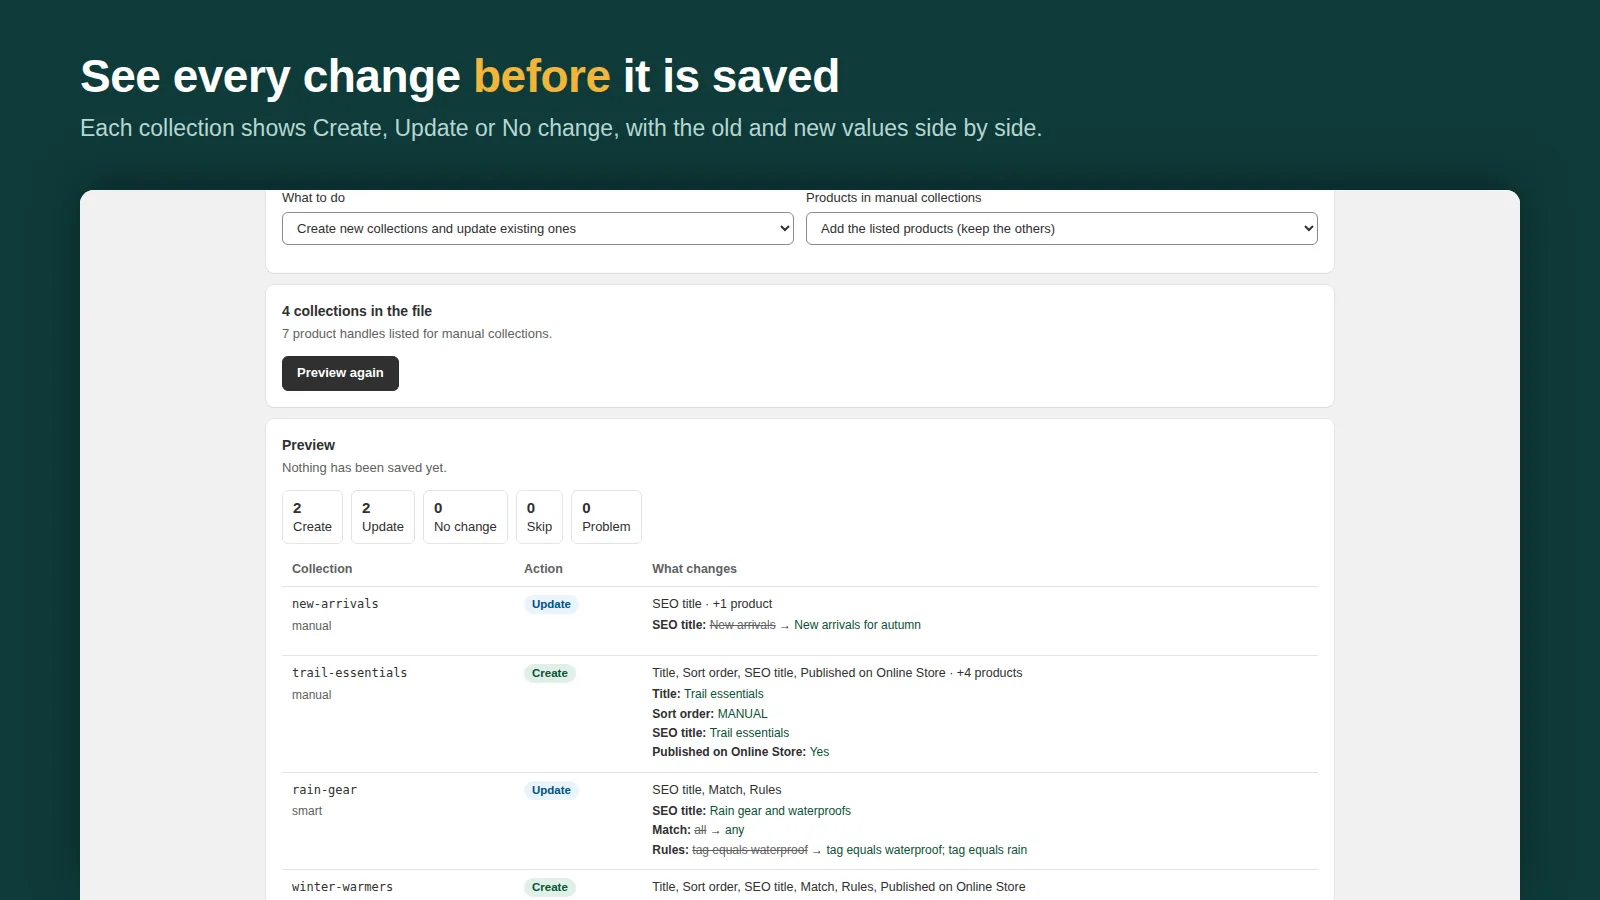
- Upload it. The preview lists every collection as Create, Update or No change, with before-and-after values, and flags a rule it can't read.
- Import. If you don't like the result, one click on Undo deletes the collections the import created and restores any it changed.
The free plan imports up to 25 collections at a time, with unlimited exports; Pro ($7.99/month) removes the limit.
Keep smart collections healthy
- Export your collections before any big change to tags, vendors or product types, so you have a copy of every rule.
- Give every collection an SEO title and description; collection pages are often a store's best-ranking pages.
- Check product counts after a catalog import. A sudden drop usually means a tag or vendor spelling changed.
More on moving collections around: how to export and import Shopify collections with CSV.
Frequently asked questions
What is a smart collection in Shopify?
A collection that adds products automatically when they match conditions you set, such as a tag, vendor, product type, price or metafield. New matching products join without any manual step.
Can I change a manual collection into a smart collection?
No. The collection type is fixed once it's saved. Create a new smart collection, then add a URL redirect from the old collection's address.
Can I import smart collections from a CSV in Shopify?
Not with Shopify's built-in tools; the CSV import covers products, customers and inventory, not collections. A collection import app such as Shelfport creates smart collections and their rules from a spreadsheet.